Autumn special: Chanterelle hunting on the Northwest Coast: A photo and recipe essay. Part I

•September 28, 2010 • Leave a Comment

This weeks post is going to be an autumn special due to the embarrassment of riches that myself and a couple of friends managed to forage up this weekend. As a result I will divide the post into two or more distinct parts. Onwards to the elongated narrative sequence, bear with me.

I can remember this time last year sitting in my cold basement suite, flicking through facebook photo albums and friends blogs, the rain and winds lashing at the thinly glassed windows, a feeling of amazement and rising jealousy as a couple of local acquaintances posted reports and images of some of the best hand foraged mushrooms this region has to offer. Accompanying the images of their foraging efforts were also images of their subsequent culinary creations for all to see and few to try.

I am pleased to say that it’s now my turn! This weekend I was lucky enough to be guided by some new friends to their secret Chanterelle stomping grounds (this secret will remain as such, I have been informed that better men have died as a result of loose tongues)!

The blind fold and zip ties were left in the back of the car, after trust was assured, and we set off north from Victoria (that’s as much as I am revealing). The sun was shining and my day had been thus far wasted, so I was very happy to be getting out into the countryside and eager to be shown how to spot these amazing little delicacies.

The thick growth of the forest concealed the fungi we were searching for.

Once we had decamped from the car and found no sign of the Chanterelles by the fairly well worn trail I was directed to try further into the slightly less welcoming undergrowth. At the beginning of the trip one of the local guides, Jasmine, had asked me if I wanted to change out of the shorts I was wearing into something that might protect my pasty English legs a little more. I had declined, and while I don’t think I would have wanted to be wearing jeans while tromping the humid forest floor, my legs did suffer slightly from the knotty, spiny tendrils of one plant and the spiked edges of the Oregon Grape (is this right Jasmine? You did tell me but I may have got the name wrong!).

We searched for the illusive fungi for a short period with no success, the usual Chanterelle locations had delivered no bounty. We saw many white, wet leaves masquerading as the edges of some huge colony of our quarry, but with further inspection revealing themselves to be nothing more than the first fallen few of the autumn season.

Jasmine’s partner, Mark, strode onwards, throwing back valuable advice and guidance that I was trying to utilize in my own search. We soon dispersed further from each other until we all occupied our own little corner of the forest. Ever searching through the undergrowth, silently, meditatively (thanks for that one Aaron) picking our way through the thick stands of old(ish) growth.

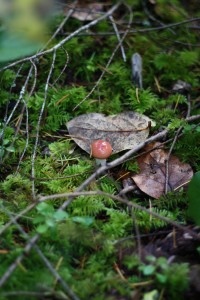
An example of the non-edible fungi we found.

Some of the minute cousins we avoided.

I found many different varieties of the fungi brethren, as can be seen from the images above. None however really offered any guide as to where their tastier, probably safer cousins could be found.

Aaron, the fourth forager of the group found the first individual specimen while a good distance from myself, Mark and Jasmine, but unfortunately the area appeared to hold no more for the picking.

Aaron and his first find (Aaron is a little out of focus, the Chanterelle is not!)

We walked further and further into the forest, any sense of the direction we had come from becoming slightly less clear in my mind. I started to think that it might be me, had I jinxed the trip as I had possibly jinxed all those fly fishing trips with my father? Just as my doubts began to rise I was presented with a decision: Take the higher clearer ground, or venture lower into the heavy undergrowth. I turned to the low ground and began to tromp my way through to a slight depression in the landscape, no bigger than eight feet round.

I had been told to look out for the edges of the Chanterelle caps, poking out from under fallen trees or heavy foliage, heavily mossy areas had also been mentioned as a common place for them to thrive. The area looked promising, despite the heavy undergrowth that surrounded it. Sure enough what at first looked to be just one of those pesky white leaves turned out to be the edge of quite a large Chanterelle. With a little digging and careful observation the area began to turn up many more examples of this beautiful and tasty fungi. As Mark had mentioned at the beginning of the trip; where there is one, there is often many.

The first few of the motherload.

White gilled beauties.

We had found what we soon began to call the motherload. The moss, which was thick in this area, was at times almost completely covering the mushroom cap, allowing only the slightest peak of white from under the greenery. With a little foraging (that’s what we were there for!) we began to pull out huge, fist sized Chanterelles. The stuff of legend! The bounty I had been promised from the outset!

Amazing specimens fresh from the ground.

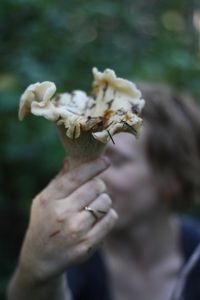
The first fist sized Chanterelle.

It barely fits in the shot.

Like all good melodramas and the odd day time soap opera it feels right to insert a pause at this point, to leave you waiting for more. You have been satisfied and well fed with description and images and I shall keep the end of our trip and the subsequent recipes for tomorrow (and maybe even the next day. This may take up multiple posts!).

Thank you for reading and looking. I hope you have enjoyed this prose based interlude and you are keen to waste some more of your working day tomorrow reading about the five or more recipes I was able to create from my share of the bounty.

The Epicurean Candidate

Recipe 16: Fine breakfast/brunch fare, Runny Egg and Avocado on toast with a fresh Tomato Salsa + news from the old country: A must for a special brunch outing.

•September 21, 2010 • 1 Comment

This is the second of what I hope to be a continuing series of posts of into the distant future. I promise to manage my time well and not sit in front of youtube watching repeats of Keith Floyd and Anthony Bourdain.

As for the recipe for today, once again this is easier than you can imagine but when done with a little care provides such a fresh, satisfying but light breakfast or brunch dish that you will return to it time after time.

Well I say you will return to it but as I have been told by a surprisingly large amoun t of friends and acquaintances recently; not everybody likes avocado. I myself could eat one for every hour of the day (as some of you may be able to tell from my glowing clear skin, glossy hair and strong nails…). I have heard it described as tasting like rancid butter by one of my good friends and so clearly it is an acquired taste. One that I certainly have acquired wholeheartedly.  For those of you who are not interested in this creamy, flavourful berry (that’s what it is apparently: http://en.wikipedia.org/wiki/Avocado), substitute it for whatever else you can think of.

The pictures at the bottom of this post show a soft boiled egg, but I have lately been perfecting the art of poaching eggs and so I have decided to include that method within the description below. I was taught how to poach an egg successfully after failing for many years and always aspiring to those I had sampled at the Wolseley in Piccadilly. I have a good friend Emma Smith to thank for this technique. She shall forever be remembered as the girl who taught me to poach eggs one blissful summer in London.

Onwards! To the recipe:

Runny Egg and Avocado on toast with a fresh Tomato Salsa

Serves 4

Ingredients:

4 large eggs

2 large or 4 small avocados, prepared and cut into slices

2-3 fresh tomatoes,

½ large white onion or 2 medium shallots, cut into slices

4-8 slices of toast or good quality rolls, preferably brown

Salt and pepper

A dash of olive oil

A light sprinkling or two of smoked, hot paprika

Method:

1. Prepare and slice the avocado.

2. Chop the tomatoes and add to the sliced onion with the dash of olive oil, salt and pepper and the sprinkling of paprika. Mix gentle to amalgamate the ingredients.

3. Take a shallow sauce pan or deep frying pan and fill with water to about 2-3 inches. Season this well with salt and bring to the boil. Crack the eggs into individual shallow glasses or ramekins. I use a small, old school martini style glass, but a small shallow sided ramekin should be fine also. The trick is to have the water at a depth so that the egg when gently dropped into the boiling water doesn’t fall so far that it freaks up. Gently tipping the egg from such a container ensures that it stays as together as possible. Once the egg is in the water you can try to amalgamate any bits of egg white that has detached with a spoon.

Make sure the temperature isn’t too high, and you don’t want to cook these for too long. The aim is to have runny eggs that have been carefully cooked. You can even cook for a couple of minutes and then remove the whole pan from the heat. The eggs will continue to cook in the hot water and you reduce the risk of under cooking them. If you don’t like runny eggs then git out of here…!

4. Toast the rolls or bread and lightly butter or brush with olive oil. You can always take a sliced piece of garlic and rub this over the toast if you want to add a slightly increased taste sensation.

5. Dish the toast up and lay the avocado slices on top. Spoon the salsa mixture evenly on this and carefully drained the poached eggs and transport to the plates on a slotted spoon.

6. Season with salt and as much freshly ground pepper as you can handle and another slight sprinkling of paprika.

Serve and enjoy with a nice fresh cup of coffee or some breakfast themed booze (preferably not a pint of Guinness, a champagne cocktail would be suitable…)

As I mentioned, I have been perfecting the art of the poached egg recently and find I am beginning to get the hang of things. There is no need to try those ridiculous techniques of adding vinegar to the water, or swirling it round to create some kind of vortex, which holds the egg together with a cosmic power unknowable to the tiny brains of man. Just use the Emma Smith technique!

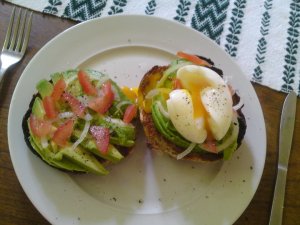
Egg whole. Runny eggs and Avocado on Toast with fresh Tomato Salsa

Egg dispatched: Runny Egg and Avocado on Toast with fersh Tomato Salsa

Egg dispatched: Runny Egg and Avocado on Toast with fersh Tomato Salsa

As promised, in other news:

I have heard from another very good friend, Alex Latter, that he has found a locale to blow my old favourite, St.Johns, out of the water when it comes to breakfast, or brunch. Now I had heard of the Hawksmoor but had never been. Its reputation for steaks was clear, but it’s prices did seem to be rather high for my meager budget.

http://www.thehawksmoor.co.uk/pdf/HWK-Brunch-Menu-March-2010.pdf

Follow the link above to see their brunch menu. My contact in the motherland had the sharing brunch and said it was huge and well conceived, and with drinks and service came to 18 pounds a head. Anywhere that serves this many meat based products for the first meal of the day is in my sights for a Christmas visit when I return. I hope to be sitting across from Master. Latter, gazing into the platter of meat placed in front of me…

On that rather salacious note I shall sign off.

Enjoy your food, whatever it is and keep your eyes peeled for next week’s recipe.

The Epicurean Candidate
Recipe 15: Back after a long time away with home grown beans, pearl barley and Sockeye salmon!

•September 14, 2010 • 2 Comments

I know. I know. It’s been a while. I don’t know why I haven’t bothered updating this blog in any real way since I got to Canada. I suppose that the main reason is that when I was working a full time 9-5 I was bored. I needed something to divert my attention from the relentless image requests from those pesky TV companies and newspapers. Like many bloggers I focused at least 50% of my day on the blog in an attempt to preserve my sanity.

Since I have got to the west coast of Canada I have had so much time on my hands that for some reason I haven’t had time to be bored?! Anyway, after returning to the UK for a couple of weeks over the summer many (a few… well a couple) of my friends asked where the blog had gone. Well it hasn’t gone anywhere, and here is the latest installment. Fingers crossed that I’ll manage to keep this going over the next year.

The following recipe was inspired by the veg I found in my garden (runner beans), food I found in my cupboard (pearl barley) and some amazing home canned freshly caught Sockeye salmon gifted to me by my SENCOTEN language tutor, Helen Jack.

Sockeye salmon and runner bean pearl barley risotto

Served 1 (or 2 smaller portions)

Ingredients:

Home canned Sockeye salmon (if you can’t get hold of this then any salmon will be fine. The Sockeye is cooked in the can, really a jar, and its juices thicken and break down some of the flesh into a beautiful sweet mush. It still has small bones so these need to be picked out, but it is an amazing and highly traditional way to preserve the fish for later use. If you do use salmon fillets then cook it slightly first then crumble into the risotto at the end of the cooking process to warm it through and ensure it is cook through. If you are using shop bought salmon, which is very different from Canadian made canned salmon, then just add this at the end of the cooking process in a similar way).

A good handful of runner beans, trimmed of the ends and cut length ways into thin strips.

1 good serving of pearl barley

½ red onion, diced

1 clove of garlic chopped and minced

Chicken, fish or veg stock (I used a good quality concentrated canned liquid stock that can be kept in the fridge after opening. Try not to use a stock cube, but I suppose it might work at a stretch. The only real issue is that they are packed full of salt and don’t taste that good. If you do use a stock cube, do not add anymore salt during cooking.)

Olive oil

Seasoning to taste

Method:

1. Mix up your stock with boiling water. Keep a pan full of stock on the hob within easy reach of the main saucepan so you can constantly add stock when needed.

2. Add olive oil to a large, deep frying pan and bring to temperature. Add the garlic and red onion and reduce the heat by half immediately. Allow the onion and garlic to soften for a few minutes. If you have diced them small enough this shouldn’t take too long.

3. Add more oil if the onion and garlic mix has soaked it all up and add the pearl barley. Make sure you mix this thoroughly so that the pearl barley is soaked in oil.

4. Cook the pearl barley through for a few minutes and then add a small amount of stock. Continue to add stock as it is soaked into the pearl barley and the grains become fat and soaked with the liquidy goodness. The best part of this is that the pearl barley will expand to a succulent, tender grain once cooked (about 15-20mins in my experience), the reduced stock also takes on a great sweetness when combined with the onions and garlic too.

5. In the meantime take the sliced beans and add to a pan of boiling water. Cook these through so that they are just blanched, you will finish cooking them through after adding them to the pearl barley risotto.

6. Drain the beans and add any left over boiling water to the risotto pan, this will allow some of the great bean flavours soak into the final dish.

7. Prep the Salmon and pull into smallish pieces (rough 1cm cubes).

8. Once the risotto looks just about ready (again, once the pearl barley has plumped right up. You can check the texture by tasting a small amount), add the beans and make sure that there is enough moisture in the pan to continue to cook the risotto mix until the beans are thoroughly cooked, but retain a certain al dente texture.

9. Add the prepped salmon and mix the whole dish until all the parts are combined. Check for seasoning and adjust as required.

10.  Serve on a plate or bowl, depending on how soupy you like it and eat!

This is one of those amazing, simple dishes that once I had the first bite in my mouth oozed with sweet bean, salmon flavours and a lovely texture from the pearl barley. It’s cheap too!

I really like to pick the beans a little bit later than is normally advised as you get to crunch down on those sweet orbs of meatiness held inside the sometimes tough pods. Because they are a bit older than the tender beans that could have been picked a week or two before, I would suggest that you slice them as finely as you can, a bean slicer/julienner is a good tool for this.

Anyway, I hope you enjoy this simple recipe and like the photos (sorry, I was half way through the meal before I decided to document it!).

Keep your eyes open for further posts, including news and views on local Victoria food.

Thanks for reading.

The Epicurean Candidate
Sockeye salmon and runner bean, pearl barley risotto

A half eaten plate of Sockeye salmon and runner bean, pearl barley risotto

Recipe 14: Impromptu meal, Breaded skate with pearl barley risotto and broccoli.

•February 22, 2010 • 1 Comment

There won’t be any images in this post as the meal came together at the last minute and I didn’t necessarily envision it being as good as it turned out to be! It’s the first time I tried pearl barley instead of the usual arborio rice and although it seemed to take a little longer to get to that nice soft consistancy.

I bought a large piece of skate from Market on Yates (http://www.marketonyates.com/yates/index.html) and found a bit of old stale bread that I’d bought a week previously from Patisserie Daniel on Cook Street (map here).

Thought it might be nice to use the stale bread, crushed, as a crust for the fish. It was a multi-grain loaf and was covered in seeds so had lots of flavour.

I must also mention that both of the establishments are damn good and well worth a visit if you in Victoria.

Anyway, on to the recipe. As with every recipe here tt’s well worth a try and may integrate some new ingredients you’ve not used before.

Breaded skate with pearl barley risotto and broccoli.

Served 1 (or two if your not greedy/hungry like me…)

Ingredients:

1 large skate fillet (cut in 2) or 2 smaller pieces

1/2 cup of breadcrumbs

1/4 cup of flour

1/2 cup of milk

1 cup of pearl barley

1 stick of celery, diced

1 carrot diced

1/2 white onion diced

Sea salt and pepper to taste

Few sprigs of tarragon

Olive oil

Chicken stock, as required.

Method:

1. Start with the pearl barley. Add the olive oil to a large flat frying pan and once it has reached heat add thediced onion, carrot and celery. Allow these to fry without colouring until they become slightly translucent. Season as required, if you are using a powdered/shop bought stock then watch how much salt you add,

2. Add the pearl barley and fry until the individual grains also become slightly translucent and are coated in the oil. Take the chicken stock and add a ladle full to the barley. Allow this to reduce and continue to add ladles of stock until the barley is soft and unctious. This took about 45mins the night I tried it.

3. While the pearl barley is cooking (remember to continually stir and watch the pan, don’t let it burn or stick to the bottom) move on to the fish. Season the fillets and sprinkle with the sprigs of tarragon, allow this to rest for a few minutes while you prepare the coating.

4. Take the left over bread and whizz in a blender, mix it with the flour and pour it onto a shallow dish. Take the milk and pour this onto a separate dish. Then take the fillets, dipping first in the milk, then the flour bread crumb mix. Make sure the fillets are fully coated and have a good thick covering of the mix.

5. When the pearl barley is nearly ready, with about 5mins to go, reduce the heat and cover the pan. Heat some olive oil in a non-stick pan and as the heat rises add the fillets. It is important that the heat is high to really crisp up the skin, but ensure that the crust doesn’t burn and the fish doesn’t overcook.

6. After the fillets have coloured on one side (around 5mins) turn them and allow the crust on the other side to colour. Reduce the heat and cook the fish through. The fillets are very thin so this won’t take anytime at all.

Serve a portion of the pearl barley and the fish with some steamed broccoli.

It’s very easy to accomplish and really worked amazingly well. It’s one for the cook book and one that would make a great mid week meal. Try it out and let me know what you think.

Thanks for reading.

The Epicurean Candidate

The 5 course dining experience…

•February 13, 2010 • Leave a Comment

I was finally able to try out something I’ve been wanting to do for a while now; cook a multiple course meal with all the old school traditions of a fish course, meat entrée, palette cleanser sorbet, a full-blown main and dessert.

The menu looked like this:

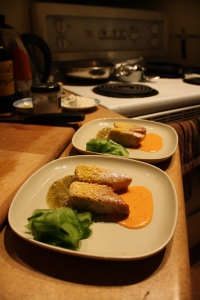
Fish Course:  Sesame and corn encrusted Tuna steak with tomatillo and cucumber salad, and a red pepper reduction.

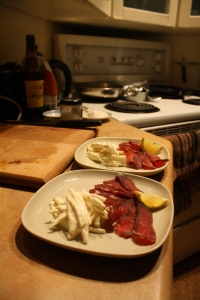
Meat entree: Home cured fillet of beef served with a celeriac rémoulade.

Pea and mint sorbet, served with ice cold vodka

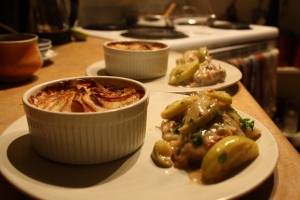
Main course: Medallions of pork loin served in an apple and cider sauce with potato gratin and walnut salad.

Dessert: Chocolate and brandy ganache served in a pistachio pastry cup with homemade crème anglaise and chcolate encrusted smoked bacon.

There are some images below for your delectation. The whole thing came together over the course of two days and all worked so well. The only thing that wasn’t so great was the pea and mint sorbet. The flavours were all there so maybe it just wasn’t the flavours I necessarily wanted! It did work as a good palette cleanser though.

The tuna and, surprisingly enough, the chocolate covered bacon were some of the best aspects of the meal, and all in all it was one of the most satisfying and succesful culinary expeditions I’ve undertaken!

It’s something I’ll be doing every weekend but was something that turned out really well. Both myself and my guest enjoyed the whole evening, and while you can’t truly experience it all these images may help in some way!

Sesame and corn encrusted Tuna with a tomatillo and cucumber salad and red pepper reduction

Home cured Fillet of Beef with a celeriac remoulade

Pea and Mint Sorbet served with ice cold vodka

Medallions of tenderloin pork served in an apple and cider sauce, with potato gratin and walnut salad

Chocolate and brandy ganache in a pistacio pastry cup, served with homemade creme anglaise and chocolate covered smoked bacon

Thanks for reading.

The Epicurean Candidate.

Recipe 13: Breakfast potatoes with yellow peppers and fried egg.

•January 28, 2010 • Leave a Comment

This is an incredibly simple brunch/breakfast/anytime meal. Simple but, as always, full of flavour and colour.

The secret is to char the peppers on a gas hob or underneath a high grill. This scorches the skin, after placing it in a sealed tupperware or clean plastic bag for a few minute and rinsing under cold water you should be able to pull the skin off in one go. If some of the blackened skin stays on the pepper don’t worry too much as this adds to the flavour.

This allows the peppers to be free from any stringy skin, leaving a soft but distinct texture.

The rest of the dish is as easy as they come, so read ahead and I hope you enjoy. In my opinion it’s better than heading out to your nearest greasy spoon or weekend brunch venue, and no doubt cheaper.

Breakfast potatoes with yellow peppers and fried egg.

Serves 2 (Healthy portions.)

Ingredients:

5 medium potatoes

1 medium white onion

1 large yellow pepper (prepared in the manner described above)

1 clove of garlic, chopped.

2 eggs, fried to taste. (personally the only way this can be served is so when you cut into the egg the yoke seeps out onto the potatoes.

Spices:

1/2 teaspoon of hot cayenne pepper

1/2 teaspoon of cumin

salt and pepper

Olive oil to fry

Method:

1. Peel (or don’t if the potatoes are nice and clean and the skin isn’t too thick) the potatoes and cut into 1 inch pieces. Parboil them in well salted boiling water until the edges of the potato begins to go slightly transparent. Drain the potatoes and leave to dry, you don’t want any water to be on them when frying.

2. Peel and halve the onion and chop into slices. Add to a wide, non-stick frying pan with enough olive oil to coat the onions, but fry without becoming too greasy. Leave the heat high for a couple of minutes until the onions just start to colour, then reduce it to ensure that they don’t burn but become sweet and tender. Add the garlic after you reduce the heat to ensure that it doesn’t burn.

3. Add the salt, pepper, cumin and cayenne pepper to the onions.

4. When the onions are ready and the potatoes are fully drained dd them to the onions. Stir gently to encorporate and add more olive oil is required.

5. Turn the heat up slightly and allow the potatoes to take on some colour. Keep an eye on it and make sure it doesn’t burn.

6. As the potatoes begin to cook through and fry up add the peppers. You want them to take on some colour too, but not cook through to the point that they will fall apart.

7. In a separate pan cook the two eggs in some olive oil.

This is basically it. You want to make sure that the potatoes are cooked through and have a nice amount of crisp to them, this provides a nice amount of texture to the dish and compares nicely to the soft, but coloured onions and soft, tender peppers.

Serve a good portion of the potatoes with a fried egg on top. Crack some fresh, black pepper on top of this and serve with some lightly toasted crusty bread. As mentioned above, if the egg is cooked lightly enough a quick stab to the yoke will send it flowing through the potatoes, peppers and onions, adding a lovely richness to the whole dish.

Simple and tasty breakfast feast

As with all the recipes in this blog its simple and satisfying. So easy for a weekend morning.

More recipes and photos to come in the not so distance future! Keep your eyes open for a prospective 5 course meal soon to be attempted!

The Epicurean Candidate
Ceramics: From which to eat, drink or merely display…

•January 14, 2010 • 1 Comment

The last photograph added to this blog features a large soup/coffee cup that I suspect was made by my current landlady in her ceramicist days. She is dabbling here and there in the art now but has scaled down her operations slightly.

Someone who hasn’t scaled down, but has in fact thrown (pun?!) herself headlong into the life of a ceramicist is Elizabeth Benotti. In a fairly recent move from Boulder, Colorado, USA to the Californian West Coast she is currently throwing and casting new creations as this post is being written. She received her BFA at the University of Colorado, Boulder, USA in ceramics and as an owner of a few of her pieces I can attest to the originality and beauty of the work.

The technicalities of her profession and the methods used are somewhat alien to me and I won’t embarrass myself with inaccurate descriptions. Her Etsy website (http://www.etsy.com/shop/ebenotti) holds all the information you may need and has some great photos of her work.

Her ceramic mugs and tableware are elegant and often full of interesting colour work. Her less functional, decorative items contain cloud and elemental form motifs. You can visit her personal website at http://www.elizabethbenotti.com/Elizabeth_Benotti_Ceramics/Home.html.

Here are some images from her Etsy page, hope you enjoy and take a look at her online store!

Elizabeth Benotti's ceramics

Elizabeth Benotti's ceramics

Elizabeth Benotti's ceramics

Elizabeth Benotti's ceramics

Thank you for reading.

The Epicurean Candidate

Recipe 12: Back from the brink and into winter soups, stews and one pot wonders.

•January 14, 2010 • 3 Comments

Right. Inspired by the comments of a certain ex-colleague, and dear friend of mine (N Dunmore, Blog link to the bottom right) and finally realising that the life of a student allows certain freedoms in the way of free time I am back on this blog with a vengeance.

A few 1000 miles from home and finally settled (as much as I can be) in the furthest reaches of Western Canada, Victoria, Vancouver Island, I am about to jump back into the recipe and food past time that still takes up so much of my imagination and free time.

The name of the game for the poor, lowly grad student, suffering the winds and rain of this moist part of world is soups and stews. Hearty one pot dishes that are cheap, easy and last a few days. They seriously warm the cockles and so far my experiments have turned out damn well.

Culminating in my last creation, a Squash, tomato and pinto bean stew (started as a soup, ended up thick and packed with veg=stew). So far I have made a vegetable and chilli soup and one pulled together from some left over brocolli and walnuts I had hanging around.

These are going to be right up there with the easy Ratatouille for simplicity, economy and satisfaction, so try this next recipe out. Its really worth a go and must contain at least 20 of your suggestion veg portions in one bite!

If anyone wants the other recipes, please let me know and I will post them up.

It’s good to be back, enjoy the food!

Squash, Tomato and Pinto Bean Stew.

Serves many. As I said these dishes make a lot. So just put them in a sealable tub and refrigerate. I have found that they get better with age (within reason!)
Ingredients:

1 tin of Pinto beans (drained and rinsed)

1 tin of chopped tomatoes

1 medium squash (deseeded and chopped into wedges

Holy trinity (base for any good soup/stew):

1 medium white onion (diced)

2 sticks of celery (cut down the stalk and diced)

3 carrots (peeled and diced)

1 yellow or red pepper (deseeded and cut into wedges)

2 medium white potatoes (peeled and chopped into 1inch pieces)

2 cloves of garlic

1 chicken stock cube dissolved in 2 pints of hot water

Spice mix:

Salt and pepper

2-3 teaspoons of Paprika (depending on heat desired)

1 teaspoons of mixed spice

1/2 teaspoon of nutmeg

1/2 teaspoon of cumin

2 small dried chillis

2-3 bay leaves

Good pinch of Dried Oregano (I used Mexican Oregano, its got good flavour and a nice heat to it. It is easy to get hold of in most good supermarkets or spice shops. Rub in between your fingers before adding to the stew to activate its flavour from the heat of your fingers.)

Good pinch of dried Rosemary/1 large fresh Rosemary sprig

To garnish:

A sprinkling of unsalted, roasted sunflower seeds

Method:

1. Preheat the oven to 350 degrees and prep the pepper and squash. Lay the pieces out on a lightly oiled baking tray and sprikle with olive oil, salt and pepper. Place in the oven and roast until the pepper is lightly coloured on both sides (flip half way through), and the squash’s flesh just gives when pierced with a knife. The squash will take longer than the pepper so just remove the pepper andchop to 1 inch pieces when it is ready and return the pumpkin to the oven.

2.  Take the Holy Trinity (chopped celery, carrot and onion) and add to a large pan on a high heat with a good amount of olive oil. When the ingredients start to sizzle reduce the heat to medium and allow the contents to cook through and take on a transparency. You do not want them to colour.

3. When the Holy Trinity has cooked through add the spice mix.  Stir this through so that the aromas are released from the spices and start to flavour the stew base.

4. Add the stock cube and potatoes. Bring the heat up and cook until the liquid is slightly reduced and the potatoes are partly cooked. Add the drained Pinto beans, charred, chopped peppers and the tin of chopped tomatoes.  Mix well and ensure that all of the ingrdients are brought together.

5. Take the squash from the oven and carefully strip the flesh from the skin with a knife and chop into 1-1 1/2 inch cubes. Add to the stew and carefully mix the whole batch together.

6. Reduce the heat to a medium simmer and allow the stew to thicken and pull together. Check the seasoning and adjust as required.

Serve with good toasted flat bread (you can scope up the larger bits of veg with the bread) and sprinkle with the roasted sunflower seeds.

Damn good winter warmer...

This recipe is so easy and can last for a few days after its been cooked. Just take a good serving and gently reheat in a smaller saucepan, serving as you did with the first batch.

The heat of the paprika and the chilies (be careful as someone might get a spicy surprise in their bowl), as well as the spice mix makes this dish warming and perfect for these dark winter nights.

Anyway, hope you enjoy the food if you try it and have enjoyed reading the blog once again.

Thank you for reading and keep your eyes peeled, there will hopefully be more posts soon!

The Epicurean Candidate

Leaving on a jet plane and Summer BBQ 2009 menu

•August 20, 2009 • 1 Comment

As most of you will be personally familiar with who I am and where I live it will come as no surprise to you that I am due to jet off to Victoria, Canada a week from today in order to undertake two years of study at the University of Victoria within the History in Art faculty.

Leaving London and all its culinary high points will be difficult (I will of course miss the people too!) but I am hoping to jump feet first into a world of fresh fish, sushi and maple syrup and therefore will certainly be continuing with this blog while I am on the North West coast of our former colony.

In the meantime check out the menu I intend to rustle up for the annual summer BBQ that will be held this saturday. It happens but once a year and while this may be the last for a couple of years (at least to be held in the UK) and it won’t be as exciting or ambitious as past years, I think I am going to stick with the basics and stick with the recipes and dishes that have been tried and tested favourites.

For those of you who aren’t going to make it salivate and realise the error of your ways. For those who are going to make it, salivate and pray that Saturday comes as quickly as possible!


Summer BBQ 2009: Farewell fair Britain…:

Homemade herb burgers: Either hache style or minced beef burgers seasoned with a special herb heavy spice mix, onions, cornichons and bound together with egg. Served in a traditional bun with choice of cheese, salad and condiments.

Slow roasted shoulder of pork: Trimmed shoulder of pork slow roasted for 8hrs, rubbed with a special BBQ style rub 24 hrs before and cooked from 6am to be ready for 2:30pm. Served with a bun and accompanied by homemade coleslaw and BBQ sauce.

Slow roasted pork ribs: Slow roasted pork ribs, again rubbed with a traditional BBQ rub 24hrs in advance and cooked for at least 6 hrs (8-2:30pm). Served with the same homemade BBQ sauce as the pulled pork.

Anything else that I can think of and find at the last minute: I am borrowing a large gas grill (I know that BBQ purists may take issue with this as you could possibly get the same smokey charred flavour as when you use wood or charcoal, but its for ease of service and efficiency ok!) so may pick up extras along the way to accompany the dishes above.

Sides: Mixed leaf salads with homemade dressings, potato salad, Coleslaw etc.

Simple and effective is the name of the game. Stuff em with well cooked, attention to detail protein based foods and your laughing. The sides are a mere side thought… Meat is the name of the game, lots of it!

Anyway, if I don’t post before I hit the shores of Vancouver Island be sure to check back after the 27th August and I will keep this sparsely viewed blog updated with my Epicurean adventures from across the seas.

As ever thank you for reading.


The Epicurean Candidate

Away days: Recipe to come

•July 30, 2009 • 2 Comments

While I am perfectly aware that there aren’t hordes of fans waiting with baited breathe for me to post a new and exciting recipe or food related musings, I thought I would warn those that have subscribed that the blog will remain dormant for a couple of weeks as I am about to jet off for a 2 week holiday to America.

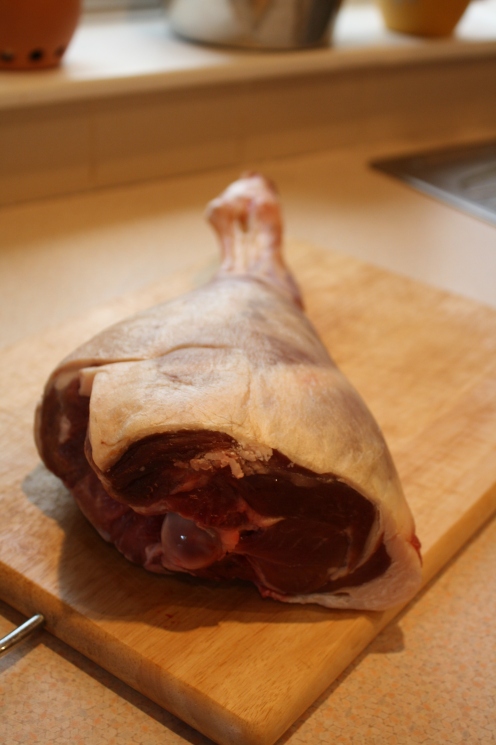
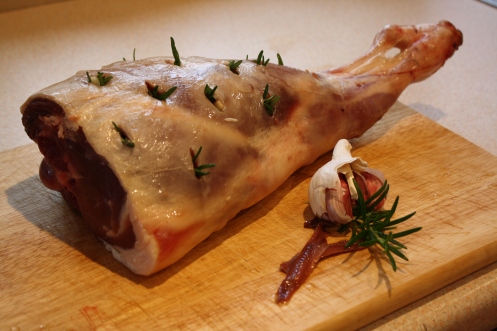
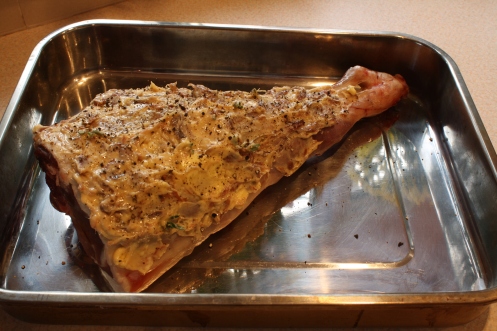
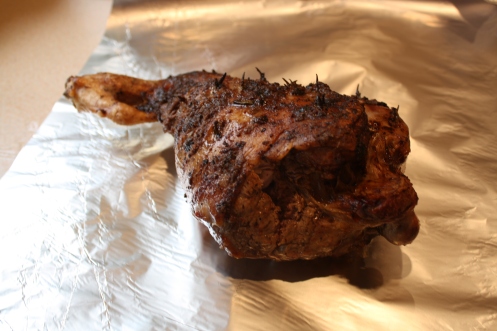
Here are some pictures of the latest excusion into food heaven. Leg of lamb with Garlic, Rosemary and Anchovies. The leg was purchased at Lingers Butchers in Bedford, and while it cost a fairly hefty £26 it was a serious piece of meat, that I suspect had been hung due to the rich red colour of the meat. It easily served 6 and while there are very rarely any leftovers when I am around there was copious amounts to go round.

So check out the images and hopefully now you really can wait with baited breath. Failing that check out the following book: Roast Chicken and other Stories by Simon Hopkinson and Lindsey Bareham (http://www.amazon.co.uk/Roast-Chicken-Stories-Paperback-Cookery/dp/009187100X/ref=sr_1_1?ie=UTF8&qid=1248961363&sr=8-1)

This is where I took the recipe and all is explained within.

Lingers Leg o Lamb: Amazing piece of meat

Lingers Leg o Lamb: Amazing piece of meat

Jeweled leg with Garlic, Rosemary and Anchovies (ingredients shown...)

Jeweled leg with Garlic, Rosemary and Anchovies (ingredients shown...)

Leg of lamb slathered in anchovie butter

Leg of lamb slathered in anchovie butter

Pre-rested leg.

Pre-rested leg.

Hope you enjoy the pictures. I would seriously suggest investing in the book. It has some classic dishes and are so easy to impress with.

Until I return and thank you for reading,


The Epicurean Candidate